以下完整指南目前为英文;游戏名称、数字与官方术语保持原样。
The loop in one paragraph
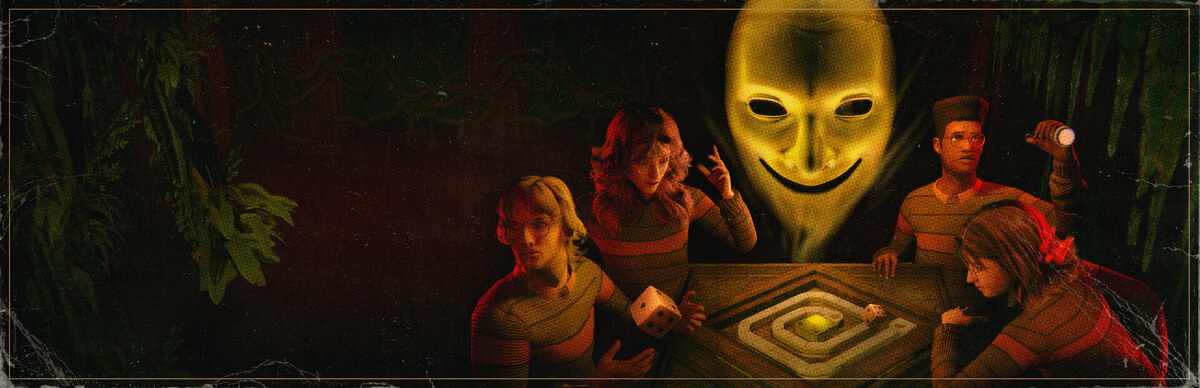
Roll the six-sided movement die in the game room. The token advances along the board, the manor rearranges, and the tile you land on asks for something: survive an event, clear a challenge, or bring back idols. Return to the board, pay the idols the tile demands, and you earn the next roll. When the token reaches the centre, the board phase ends, the squad is pulled deeper into the manor, and the final objective begins.
A full run is reported to require 19 movement points. The movement die caps at six, so no squad finishes in three lucky rolls. Plan for multiple board cycles, multiple idol runs and at least one death.
The board game loop, step by step
- Gather in the game room. Rolling while half the squad is across the manor is how runs end early.
- Roll the movement die. The token moves; rooms can change position; a new threat may enter the run permanently.
- Resolve the tile. Events, challenges, traps and monster spawns are all tile outcomes. Some ask for a fetch, some ask for survival, some split the squad.
- Collect idols. Search drawers, bags, closets, shelves — anywhere a small object can hide. Idols are the only way to buy another roll.
- Return and pay. Put the required idol value on the board. The next movement roll unlocks.
- Repeat until the token reaches the centre. All players are then teleported deeper into the manor.
- Recover the Gamemaster's Soul. Bring the soul idol back to the board, seal it, and say “Invokyr” into the microphone to finish the run.
The game does not pause while you explore. Every roll is a commitment: it spends the die, advances the board and can summon something that stays for the rest of the session.
Dice rules that apply to every die
Special dice are found in the manor, usually in drawers and containers, sometimes on tables. They are single-use. Most follow the same risk profile:
- 5-in-6 — good roll: the die does what its name promises.
- 1-in-6 — bad roll: the effect misfires, reverses or is replaced by a chaos event: lightning, fireworks, an explosion or a minor monster spawn.
That means a “safe” die is never safe. It is a 16.7% chance of a different problem. The practical consequence: do not spend a utility die on a low-threat tile, and do not stand in the landing zone when someone throws one.
Most dice are thrown and land where they land. The effect is centred on the impact point, not on the player. A healing circle you cannot reach is wasted; a teleport die that lands in a locked room is a one-way trip.
Every confirmed die and what it does
| Die | Good roll | Bad roll / caveat |
|---|---|---|
| Heal | Circular healing area: living players inside recover 50 HP; dead players inside revive with 10 HP | Still requires players to be inside the circle |
| Resurrect | Revives one random dead player, even if the body was left in an earlier layout | Bad roll spawns a Player Mimic that can use dice against you |
| Fire | After a short delay, the landing area ignites; burns flammables and some monsters | Fire starts immediately |
| Storm | Delayed lightning strike at the landing point; damages players or monsters and can ignite ground | Lightning strikes immediately |
| Freeze | Immobilises the entity hit for several seconds | Ground at the landing point catches fire |
| Cocoon | After a delay, entities near the impact are cocooned; players can struggle out | Cocoon activates immediately — including on teammates |
| Chaos | Activates one of the six effects shown on its faces | The face decides; you do not |
| Teleport | Teleports the thrower to the landing point | Spawns a minor monster, usually a Dress Mannequin or Penguin |
| Antigravity | A sphere of reduced gravity; float across gaps and move idols | Effect is spatial — the die must land where you need it |
| Scanner | Radar pulse reveals interactables through walls and doors; idols, players and monsters glow green | Information only; no damage, no escape |
| Rally | Teleports every player to the landing point | Can drag a teammate out of a safe position |
| Lantern | Creates a portable lantern; can be dropped as a marker and recoloured | Light source, not a weapon |
| Thread | A thread rolls toward the game room, giving you a path back | Path only; monsters still use it |
| Cube | Spawns a large movable cube for climbing | Dispenser-only die |
| Firework | Fireworks bounce and explode; touching one deals 1 damage | Dispenser-only die; the bounce is unpredictable |
The dice you should prioritise
For a first squad, the priority list is short:
- Resurrect — the only die that undoes the worst outcome. It also auto-revives its carrier once if they die while holding it.
- Heal — 50 HP to everyone in the circle is the best raw recovery in the game.
- Teleport — the cleanest escape from a blocked path or a losing chase.
- Cocoon — crowd control that works on monsters and, accidentally, on friends.
- Fire — area denial; best used behind you, not on the tile you need to cross.
Scanner and Thread do not look exciting, but they solve the two failure modes new players hit most: not finding the objective and not finding the way back.
Teleport die: the rules people get wrong
The teleport die moves the thrower, not the whole squad. It lands where it lands, and you arrive there. That makes it excellent for:
- crossing a blocked or collapsed route;
- reaching an idol on a ledge without a parkour chain;
- escaping a monster when the corridor behind you is already lost.
It is not a rescue tool. Throwing it to “help” a downed teammate does nothing for them unless you land next to them, and the bad roll can drop a Dress Mannequin or Penguin on the landing point. If the die lands somewhere you cannot survive, you have teleported into the problem.
Rally is the squad-wide version. It pulls everyone to the landing point, which is powerful after a split, and catastrophic if the landing point is hot.
Dice dispensers
A dispenser produces the die type shown on top and recharges after the previous die is used. The common dispensers in the manor are Scanner and Cocoon. Cube and Firework dice come from shop dispensers rather than loose pickups.
Idols: the real currency
Idols are not score. They are the toll that unlocks the next roll.
| Idol | Value | Notes |
|---|---|---|
| Bronze | $100 | Common; the baseline payment |
| Silver | $150 | Mid-tier |
| Gold | $200 | High-value; carry it back, do not gamble it |
| Diamond / special | Varies | Rare; some special idols have effects while carried |
Values are the guide-reported launch numbers. The board asks for a total, not a specific idol, so a gold idol can cover a bronze-and-silver demand — but you lose the change in flexibility.
Special idol effects to expect
Some idols are cursed objects, not just money:
- Spider idol runs away and slams doors; you have to chase it.
- Fire idol can surround you with a ring of fire when picked up.
- Map inverter flips the map left-to-right.
- Control inverter reverses your movement controls.
- Pitch-black idol plunges the area into darkness until dropped.
The counter is boring and effective: pick up unknown idols in a lit room, with a teammate watching the corridor, and drop the idol immediately if the effect makes the route unsafe.
Monsters: what is confirmed and how to survive
The launch build has a large roster, and not every name has a public, verified behaviour breakdown. These names are confirmed in launch-build guides:
Alligator · Carnivorous Plant · Dress Mannequin · Horsemen · Huntsman · Mimic Door · Money Man · Mummy · Penguin · Player Mimic · Sandworm · Shadow Man · Snowman · Spider · Yeti
What is confirmed about behaviour is narrower:
| Entity | Confirmed behaviour | Practical response |
|---|---|---|
| The Gamemaster | Board arbiter; triggers summons and rule changes | Roll only with the squad staged around the board |
| Yeti | Fast linear charge in the Icy Mountain board | Fight the urge to sprint in a straight line; break the charge around solid geometry |
| Player Mimic | Spawned by a bad Resurrect roll; can use dice against players | Treat a sudden “teammate” with dice as hostile until proven otherwise |
| Dress Mannequin / Penguin | Minor monsters spawned by a bad Teleport roll | Clear the landing point before the squad follows |
| Mimic Door | A door that is not a door | Open with the squad together, not alone |
| Cocoon-type threats | Web and cocoon effects can trap players | Check doorframes and ceilings before crossing |
Community “tier lists” for Invokyr are mostly guesses dressed as data. The store page does not publish monster stats, and behaviours change between patches. Learn the sensory rules below instead; they transfer to every entity.
The three sensory rules that always apply
- Line of sight starts the chase. Break it with a corner, a door or a locker. Backpedalling down a straight hallway keeps you in the cone.
- Sprinting is a location broadcast. Running on timber, ice or gravel tells the house where you are. Short bursts, then stop and listen.
- Height and geometry beat speed. Low cover, raised platforms, stair turns and doorframes break both pathing and sight. The cube, antigravity and cocoon dice exist to create those breaks.
Co-op roles that work for six players
You do not need a formal class system. You need the squad to stop doing the same thing at the same time.
| Role | Job | Failure it prevents |
|---|---|---|
| Table anchor | Tracks the board, calls the roll, watches the summon gauge | Rolling while the squad is split |
| Lead scout | Probes the next wing, marks hazards, finds the route back | Everyone getting lost at once |
| Dice courier | Carries found dice back to the table instead of using them on sight | Wasting a Resurrect on a low-threat tile |
| Rear watch | Listens for spawns and counts heads | A silent teammate going down behind the group |
| Rescue runner | Holds a Resurrect or Heal and moves to downed players | Losing a body in a rearranged wing |
The buddy rule: never explore alone. Two players can revive, distract and confirm a route. One player can only die quietly.
First-run checklist
- Put one player on the board and keep them there for the roll.
- Bring dice back before using them. Pool first, spend second.
- Carry idols as a group; the payment is a squad objective, not a solo fetch.
- Learn the route back to the game room before you go deep.
- Save Heal and Resurrect for deaths and boss-phase damage, not chip damage.
- When the token reaches the centre, empty your hands and move as six. The final phase starts immediately.
Guide questions
How many movement points do you need in Invokyr?
A full board is reported to require 19 movement points, which is why a run needs multiple rolls. The movement die is six-sided.
What is the best die in Invokyr?
Resurrect is the highest-value die for a new squad: it revives a random dead player anywhere and can save its carrier once. Heal is the best recovery die.
What does the teleport die do?
It teleports the thrower to where the die lands. A bad roll spawns a Dress Mannequin or Penguin at that spot. It is an escape and traversal tool, not a team rescue.
Can dice be reused?
No. Special dice are single-use. Dispensers recharge, but the die they produce is consumed when activated.
How do you finish a run?
Reach the centre of the board, recover the Gamemaster's Soul, bring it back to the board, seal it, and say “Invokyr” into your microphone.
资料来源
Claims on this page are checked against the list below. Community guides are labelled as player-tested, not official.
- GG Guides — Invokyr dice, idols, monsters and events — Dice effects, the 5-in-6 / 1-in-6 roll rule, idol values, monster names and the end-of-run sequence. Player-tested launch-build guide.
- Steam store listing — Invokyr (app 3883570) — Cursed board game premise, 1–6 online co-op, single-use dice, jungle / ice mountain / toy chest biomes, Gamemaster objective.
- madkup — Invokyr beginner guide, part 1 (YouTube) — 19 movement points, the roll → challenge → idols → next roll loop, priority dice and idol effects.
- Steam Community — Invokyr strategy guide — Community strategy notes used for co-op role and dice-pooling advice.
继续阅读
到原始来源核对
价格、平台与当前版本仅以 Steam 商店页为准。